Laser power supply replacement

Laser power supply replacement


Notes
NOTE:
● Please keep the disassembled screws properly to avoid loss
● Before unplugging the cable, please take a photo to record the connection status to preventincorrect wiring during reinstallation.

Tools that need to be prepared                                                                                                                                                                                                                                                                                                                                                                              Hexagonal wrench m2&m3, cross screwdriver(XRF)                                                                                                                                                                                                                                                               

Disassemble the casing

①.Ensure that the device power is disconnected                                                                                                                                                                                                                                                                        

  ②.Use an M2 hex wrench to unscrew the screws on the back cover of the device, and then remove the back cover                                                                                                                                                                                                                                                                                                                                                                                                                                                                                                                                                                                                                                                                                                                                                                                                                                                                                                                                                                                                                                                                                   
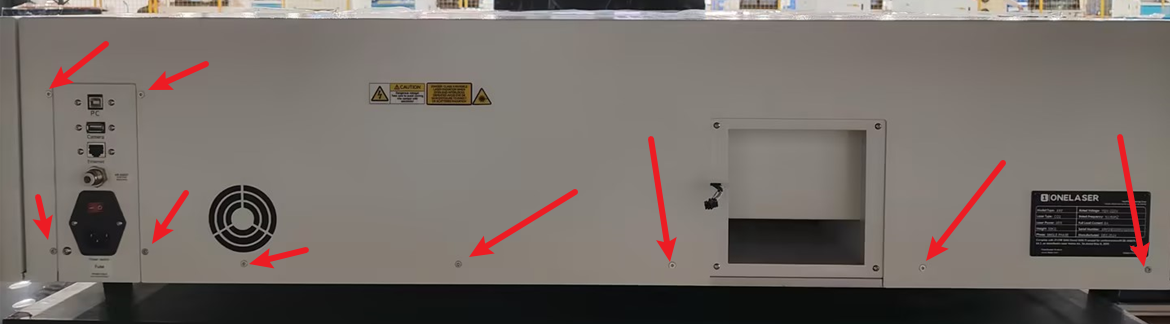
③.Unscrew the screws on the right cover plate                                                                                                                                                                                                                                                                                                                                                                                                                                                                                                                                                                                                                                                                                                                                                                                                                                                                                                                                                                                                                                          
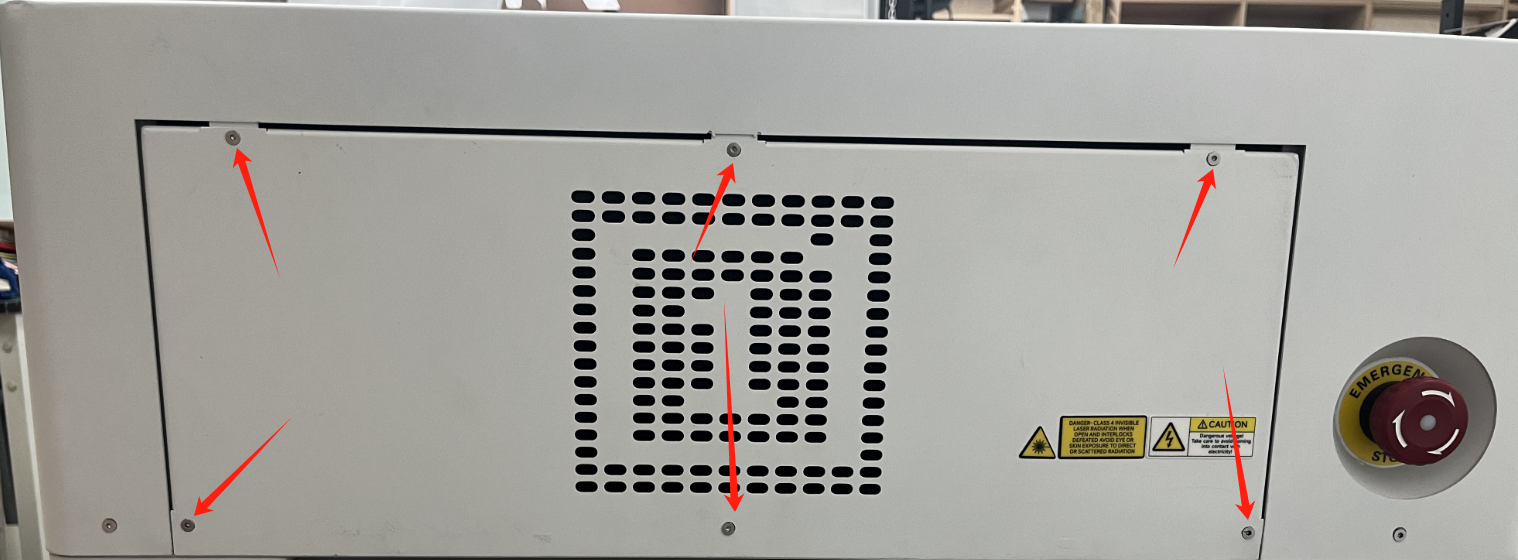
XRF Switching Power Supply Replacement

    Disassemble the switch power supply

   ①. Use a hex wrench to unscrew the screw that secures the switch power supply

   ②. Use a Phillips screwdriver to remove the installation bracket for the switch power supply                                                                                                                                                                                                                                                                                                                                                                          ③.Use a Phillips screwdriver to disconnect all the wires connected to the switch power supply, and then remove the switch power supply                                                                                                                                                                                                                                                                                                                                                                                    

Install switch power supply

① Fix the new switch power supply on the casing and connect the wires

②. Install and fix the casing                                                                                                                                                                                                                                                                                                               

XT laser power supply replacement

Disassemble the laser power supply

①.Rotate counterclockwise to unscrew the positive and negative wires                                                                                                                                                                                                                                                                                                                                                                                  ②. Pull out the terminals of the power and signal wires

     ③. Unscrew the screw that secures the laser power supply with a hex screw to remove the laser power supply                                                                                                                                                             


Install laser power supply

①.  Fix the new laser power supply onto the casing

②. Connect the terminals of the positive and negative pole lines, power line, and signal line

③. Install and fix the casing

    • Related Articles

    • Laser Power Supply Replacement

      Tools Required One screwdriver, Phillips screwdriver, door cover key The laser power supply is installed at the back of the machine. Note: The power must be disconnected before operation to avoid the risk of electric shock. 1. Glass Tube Laser Power ...
    • Laser Replacement

      Note: 1.The following operations should be performed after power disconnection. 2.Please keep the removed screws properly to avoid loss. Disassembly of the Enclosure Both XT and XRF models require disassembly of the casing Use an M2 hex wrench to ...
    • Laser replacement

      Notes: 1.Before operation, the power must be disconnected, otherwise there is a risk of electric shock. 2.Please keep the screws that are removed properly to avoid losing them. Tools Required: Hex wrench,flathead screwdriver,Phillips screwdriver,door ...
    • No Laser Beam

      Issue phenomenon The machine works normally but there is no laser output. Causes & Solutions 1.Wrong processing parameters If the speed is too fast and the power is too low, there will be no traces during the engraving process. Please set the correct ...
    • Control card replacement

      Tools that need to be prepared Door cover key, cross screwdriver Replacement steps 1. Disconnect the power supply of the device 2. Open the lower right door of the device 3. Disconnect all lines on the control board Note: Please take a photo and ...